Call (610) 767-7110

mitchell1

/CRM Mitchell1

About CRM Mitchell1

This author has not yet filled in any details.
So far CRM Mitchell1 has created 337 blog entries.

2009 Nissan Maxima

2023-06-03T22:02:39+00:00

Nissan Maxima

Mileage
139,478
Service Date
6/2/2023
Services Performed
  • Remove the front steering and suspension system components. Disconnect the sway bar assembly and links. Remove the fasteners from the ball joints and bushings. Clean all hardware and rethread as necessary. Clean the chassis mounting points and install new control arm assembly. Lubricate all pivots and torque the hardware to specification. Reassemble the sway bar links and bushing assemblies and reattach and torque the spindle. Reinstall steering components check and or set all tire pressures. Install 4 laser heads on vehicle and take initial measurements. Adjust factory toe angle to specification. Note: Shims, Eccentrics and labor for fixed alignment angles in both the front and the rear are not included.
  • LATERAL LINK – Remove & Replace – Lower,Rear,One Side
  • Remove the vehicles wheels in order to gain access to the outer tie rod end. Remove any components that interfere with the removal of the tie rod end (braking components, shields). Remove cotter pin and the hardware that attaches the tie rod end to the spindle and adjusting sleeve. Remove the faulty tie rod end and clean the threads in the adjusting sleeve. Apply anti-seize compound to the threads of the new tie rod end and install into the adjusting sleeve and spindle. Tighten all hardware to manufacturers specification and grease all applicable joints on the steering components and reinstall vehicles wheel.
  • Price includes mounting, balancing, flange machining, tire disposal, and resetting / relearning of the tire pressure monitoring systems data, and sensors where necessary.
  • Road test the vehicle to verify any alignment concerns. Check and or set all tire pressures. Install targets on the vehicles wheels, and take initial alignment measurements. Adjust the factory toe angle to specification, and verify that the other alignment angles on both the front and rear axles are within specifications. Note: Shims, Eccentrics and labor for fixed alignment angles in both the front and the rear are not included.
 
Colin C. gave our service a 5 star review on 6/2/2023
2009 Nissan Maxima 2023-06-03T22:02:39+00:00

2011 Chrysler 200

2023-05-20T22:01:48+00:00

Chrysler 200

Mileage
97,575
Service Date
5/18/2023
Services Performed
  • Found the front struts and tops are making noise along with the front sway bar end links are loose and the bushings are torn. The transmission mount is also torn.
  • Customer states check for front end noise. Found that the struts and tops are making noise. Replace complete strut assemblies. Remove front wheels, suspension and braking system components necessary to access the front struts. Remove ABS wheel speed sensors if applicable. Disassemble upper cowl and shields necessary to access the upper mounting bolts. Remove strut assemblies and clean both side spindle bores. Lubricate all front suspension system components and check components for wear. Replace top mounting plates, bushings and strut bearings. Replace mounting hardware and torque to specification. Refit new strut assemblies into the vehicles mounts and reassemble removed components. Torque steering, suspension, and braking system components, and reinstall access panels. Reinstall wheel speed sensors and set the sensor air gap. Run ABS system test using the data scanner to insure that the ABS components are working properly. Check and or set all tire pressures. Install 4 laser heads on vehicle and take initial measurements. Adjust factory toe angle to specification. Note: Shims, Eccentrics and labor for fixed alignment angles in both the front and the rear are not included.
  • Customer states check for front end noise. Found the sway bar end links are loose and making noise and the sway bar bushings are torn. Replace end links and bushings. Remove any necessary components to gain access to the sway bar end links. Remove all attaching hardware and remove end links from vehicle. Clean all bores that the end links attach to, to prevent any unnecessary noises and or accelerated wear of the replacement components. Install the new end links into the control arm and sway bar sockets and tighten all hardware to specification. Install any previously removed components, back to their original locations and road test the vehicle to verify there are no noises, clunks, or issues associated with the sway bar end links.
  • Customer states check for front end noise. Found the transmission mount is torn. Replace transmission mount. Remove all components necessary in order to gain access to the engine mounts. Remove all attaching hardware for the mounts and raise the engine slightly in order to remove the engine mounts. Remove the mount from the vehicle and install the new mounts into position and tighten all hardware to specification. Lower the engine back into position and center the driveline. Install all previously removed components back to original configuration and road test the vehicle.
  • Road test the vehicle to verify any alignment concerns. Check and or set all tire pressures. Install targets on the vehicles wheels, and take initial alignment measurements. Adjust the factory toe angle to specification, and verify that the other alignment angles on both the front and rear axles are within specifications. Note: Shims, Eccentrics and labor for fixed alignment angles in […]
2011 Chrysler 200 2023-05-20T22:01:48+00:00

2014 Honda CR-V

2023-05-18T22:02:19+00:00

Honda CR-V

Mileage
105,402
Service Date
5/17/2023
Services Performed
  • Remove necessary shields to access the pressure ports. Install manifold gauges and monitor systems static and dynamic system pressures. Check all air conditioning electrical system components including switch, relays, and pressure switches. Add refrigerant to the system if necessary for leak testing and inject the system with luminescent dye. Check the system for refrigerant leaks using dye detection equipment. Check hoses, clamps, evaporator drain, condenser, receiver dryer, and expansion valve for leaks. The system was low on refrigerant. Recharged the system and checked for leaks. No leaks are visible at this time.
 
Randall B. gave our service a 5 star review on 5/17/2023
2014 Honda CR-V 2023-05-18T22:02:19+00:00

2020 Subaru Legacy

2023-05-09T22:03:00+00:00

Subaru Legacy

Mileage
37,601
Service Date
5/8/2023
Services Performed
  • Check the vehicles under hood fluid levels and remove the oil fill cap and breather assemblies (where applicable) Remove the vehicles engine oil drain plug, and drain the contents of the engines oil pan or sump. Remove the filter assembly and clean the sealing surfaces of the housing for reinstallation. On cartridge equipped vehicles, replace the housing O rings and clean the debris from the housing and relief valves. Lubricate the O rings on the housing and or the filter assembly and replace the filter or element. Clean and inspect the oil drain plug gasket, and check the threads in the engines oil pan. Torque the plug to the manufacturers specification using a new gasket where required. Clean the grease zerks to remove debris, and lubricate all accessible fittings on the vehicles steering, suspension, driveline and chassis components. Check and or set the tire pressures and relearn the TPMS system where required. Fill the engine with the manufacturers specified type, grade, and viscosity engine oil and verify level after purging the new filter. Check and or top off all low fluid levels and reset the maintenance reminder system where applicable. Note. Some vehicles maintenance reminders do not take on initial reset. If your maintenance light happens to come on following an oil service, please give us a call so we can correct it.
 
Anna C. gave our service a 5 star review on 5/8/2023
2020 Subaru Legacy 2023-05-09T22:03:00+00:00

2007 Toyota Tacoma

2023-04-27T22:04:02+00:00

Toyota Tacoma

Mileage
144,540
Service Date
4/26/2023
Services Performed
  • Check the vehicles under hood fluid levels and remove the oil fill cap and breather assemblies (where applicable) Remove the vehicles engine oil drain plug, and drain the contents of the engines oil pan or sump. Remove the filter assembly and clean the sealing surfaces of the housing for reinstallation. On cartridge equipped vehicles, replace the housing O rings and clean the debris from the housing and relief valves. Lubricate the O rings on the housing and or the filter assembly and replace the filter or element. Clean and inspect the oil drain plug gasket, and check the threads in the engines oil pan. Torque the plug to the manufacturers specification using a new gasket where required. Clean the grease zerks to remove debris, and lubricate all accessible fittings on the vehicles steering, suspension, driveline and chassis components. Check and or set the tire pressures and relearn the TPMS system where required. Fill the engine with the manufacturers specified type, grade, and viscosity engine oil and verify level after purging the new filter. Check and or top off all low fluid levels and reset the maintenance reminder system where applicable. Note. Some vehicles maintenance reminders do not take on initial reset. If your maintenance light happens to come on following an oil service, please give us a call so we can correct it.
 
Stephen K. gave our service a 5 star review on 4/26/2023
2007 Toyota Tacoma 2023-04-27T22:04:02+00:00

2005 Ford Pickup

2023-04-20T22:01:46+00:00

Ford Pickup

Mileage
130,210
Service Date
4/19/2023
Services Performed
  • Check the vehicles under hood fluid levels and remove the oil fill cap and breather assemblies (where applicable) Remove the vehicles engine oil drain plug, and drain the contents of the engines oil pan or sump. Remove the filter assembly and clean the sealing surfaces of the housing for reinstallation. On cartridge equipped vehicles, replace the housing O rings and clean the debris from the housing and relief valves. Lubricate the O rings on the housing and or the filter assembly and replace the filter or element. Clean and inspect the oil drain plug gasket, and check the threads in the engines oil pan. Torque the plug to the manufacturers specification using a new gasket where required. Clean the grease zerks to remove debris, and lubricate all accessible fittings on the vehicles steering, suspension, driveline and chassis components. Check and or set the tire pressures and relearn the TPMS system where required. Fill the engine with the manufacturers specified type, grade, and viscosity engine oil and verify level after purging the new filter. Check and or top off all low fluid levels and reset the maintenance reminder system where applicable. Note. Some vehicles maintenance reminders do not take on initial reset. If your maintenance light happens to come on following an oil service, please give us a call so we can correct it.
  • Check hubs and brakes
 
Richard K. gave our service a 5 star review on 4/19/2023
2005 Ford Pickup 2023-04-20T22:01:46+00:00

2017 Toyota Tacoma

2023-04-12T22:00:39+00:00

Toyota Tacoma

Mileage
89,280
Service Date
4/11/2023
Services Performed
  • Install data scanner and engine analyzer. Run tests on the body controller and anti lock braking system computer control units. Remove fault codes from the processors memory. Codes exist in the system for <<<<<<>>>>>>. Perform all necessary pin point tests checking the wiring, grounds, relays, and related circuit components to isolate the problem to the <<<<<>>>>>.
 
Robert N. gave our service a 5 star review on 4/11/2023
2017 Toyota Tacoma 2023-04-12T22:00:39+00:00

2013 Subaru Outback

2023-04-09T21:58:11+00:00

Subaru Outback

Mileage
127,482
Service Date
4/7/2023
Services Performed
  • Check the vehicles under hood fluid levels and remove the oil fill cap and breather assemblies (where applicable) Remove the vehicles engine oil drain plug, and drain the contents of the engines oil pan or sump. Remove the filter assembly and clean the sealing surfaces of the housing for reinstallation. On cartridge equipped vehicles, replace the housing O rings and clean the debris from the housing and relief valves. Lubricate the O rings on the housing and or the filter assembly and replace the filter or element. Clean and inspect the oil drain plug gasket, and check the threads in the engines oil pan. Torque the plug to the manufacturers specification using a new gasket where required. Clean the grease zerks to remove debris, and lubricate all accessible fittings on the vehicles steering, suspension, driveline and chassis components. Check and or set the tire pressures and relearn the TPMS system where required. Fill the engine with the manufacturers specified type, grade, and viscosity engine oil and verify level after purging the new filter. Check and or top off all low fluid levels and reset the maintenance reminder system where applicable. Note. Some vehicles maintenance reminders do not take on initial reset. If your maintenance light happens to come on following an oil service, please give us a call so we can correct it.
  • Repair Exhaust
  • A month ago, the car would not start. eventually started and CEL came on. Had cam and crank codes. system has been cleared and reset. check to make sure everything is ok. See note.
  • Visually check the vehicles lighting system to confirm customer condition. After inspection it was found the both low beam headlight are out. Remove the vehicles front wheels. Remove any trim interfering with the removal of the inner fender liner. Remove the vehicles fender liner in order to access the rear of the headlight housings. Remove the old bulb(s), and clean and tighten the electrical terminals. Install a new low beam headlight bulb, and reattach the electrical connections and locks where necessary. Clean the previously removed hardware and reinstall the removed shields and covers. Test the operation of the vehicles lighting system to confirm that the lighting is operating properly. Verify both high and low beam head lamp alignment using a projection aligner and adjust as required.
 
Terry S. gave our service a 5 star review on 4/8/2023
2013 Subaru Outback 2023-04-09T21:58:11+00:00

2005 Volkswagen Jetta

2023-04-05T22:01:16+00:00

Volkswagen Jetta

Mileage
137,775
Service Date
4/4/2023
Services Performed
  • Passenger Side Window
  • WINDOW REGULATOR – Remove & Replace – Mfr Body CD A4,99 IN. WB Rear,One,Power
  • Remove the hardware and hangars attaching the existing exhaust components to the vehicle. Remove the existing exhaust components from the vehicle and mark the system for the replacement components. Clean and flare any connection ends to accept the replacement components and clean any flanges to remove any residual sealing material Position the new components into location using new gaskets, clamps, and hardware where necessary. Ensure proper clearances are met and tighten the systems fittings to specification. Road test the vehicle, and check for clearance issues as well as system leaks.
 
Tiffany H. gave our service a 5 star review on 4/4/2023
2005 Volkswagen Jetta 2023-04-05T22:01:16+00:00

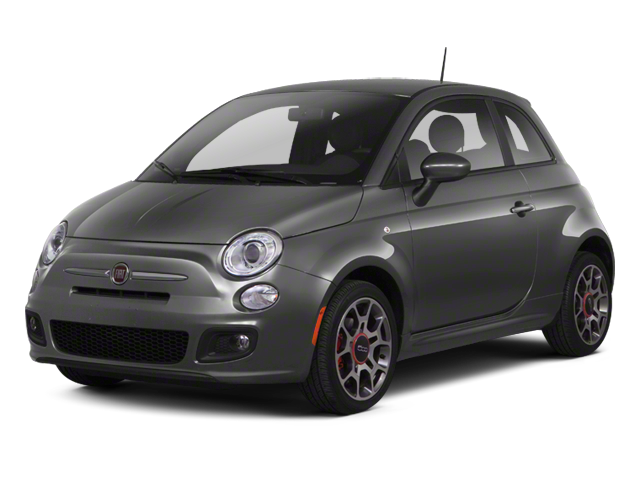
2013 Fiat 500

2023-03-30T22:01:27+00:00

Fiat 500

Mileage
95,309
Service Date
3/29/2023
Services Performed
  • REPLACE SERPENTINE BELT
 
Eric S. gave our service a 5 star review on 3/29/2023
2013 Fiat 500 2023-03-30T22:01:27+00:00